Sunday 30 December 2012

A New Arrival...

All,

As alluded to in last night's post.... The Timber Water Tank Stand kits are complete & ready to go...Only 6 weeks late!!!....a marathon 4 day & night effort has the first run packed and awaiting their new homes.

A last minute order from the U.S. for a fair quantity of kits, destined for retail sale,  set the cat amongst the pigeons. I am told this style of water tank stand was used in some parts of the U.S. & as a casual observer of happenings over there...I was not in a position to argue the point.  They were added to the manufacturing list... are now on their way & do not impact on the local first run quantity available.


Kit Box Lid Graphics...


There are some details & changes to the kit i would like to cover in this post...

1. The replacement floor for the Casula Hobbies tank ( as discussed in an earlier post ) is now a feature of all kits.  It was just too difficult to predict which tank people would use in the long term... so why not just add it to all kits.

2. The one piece bearer & column assembly has been the main feature of this kit.  As basswood is relatively fragile we have lasered the components incorporating retaining frets & these will be supplied in 2 sheets each containing two assemblies per kit.  This should ensure that the components reach the customer undamaged...As stated in the kit instructions...care & patience needs to be taken when assembling these components as the bearer is oriented across the grain with the columns lasered along the grain.  Across the grain being the fragile plane... The only other option was to supply all the columns & bearers as individual components.  This option would entirely destroy the magic of this kit & would make accuracy in construction very difficult & tedious. When the components are installed to the base & the joists added, a very strong base is the end result.


3. The final retail price has caused me some angst & while i hoped to be able to send to market at under $35.00 inclusive... Reality has to come to the fore & we have had to adopt a price of $37.50 with an expectation of sales at around 250 units long term.... So the price will be $37.50....

For the moment we will remain selling on ebay & look at other avenues in the future.  We can announce though that this kit & soon the entire range will be available through Gwydir Valley Models....this should take effect when Warren reopens in mid January.

Kits Earmarked For Warren at Gwydir Valley Models...


For those of you who have emailed during the last few months regarding this kit....please accept this posting as a notice of the impending release of the kit.  We will allow the new year to ring in & then list on ebay around the 2nd January...To give those people a chance to catch up...

These kits are not a "limited edition".... they will be available on a permanent basis & if sales mean we exhaust our stock earlier than anticipated... do not worry there will be more available..... We will also be taking feedback for development of other designs of timber stands... There was plenty of variations & i have a feeling we may have more choices for tanks in the future???!!!

Even though we are a tiny player in the world of model railways...I am excited about this kit & hope that it fills a void in the market & means that all modellers who have had tank kits or completed units laying around in the " to do" bin can look forward to actually installing 1 or 2 completed water tanks & timber stands on their layouts..... It has been an enjoyable experience developing this kit!!!

Now To The Layout Room!!!!

Regards,
Rod


A Modelling Proposition...With Butter

All,

It has been a while between posts...A fact i have been reminded about quite a number of times.  One email arrived with the subject heading " Is Anybody There" & that was the sum total of the email!!!

The normal lead up to Christmas around here normally means that business drops off around 1st week of December as clients start to get into the festive mood & oil company budgets dry up & does not pick up again until late January... I like it like that!!!  Not so this year & indeed there is still a backlog of work which has only been tempered by an announcement that we were closing until mid January.  While not technically correct...This was the only way to buy some time to get the gestation period of at least one kit finalised & hopefully leave time to catch up with other matters.

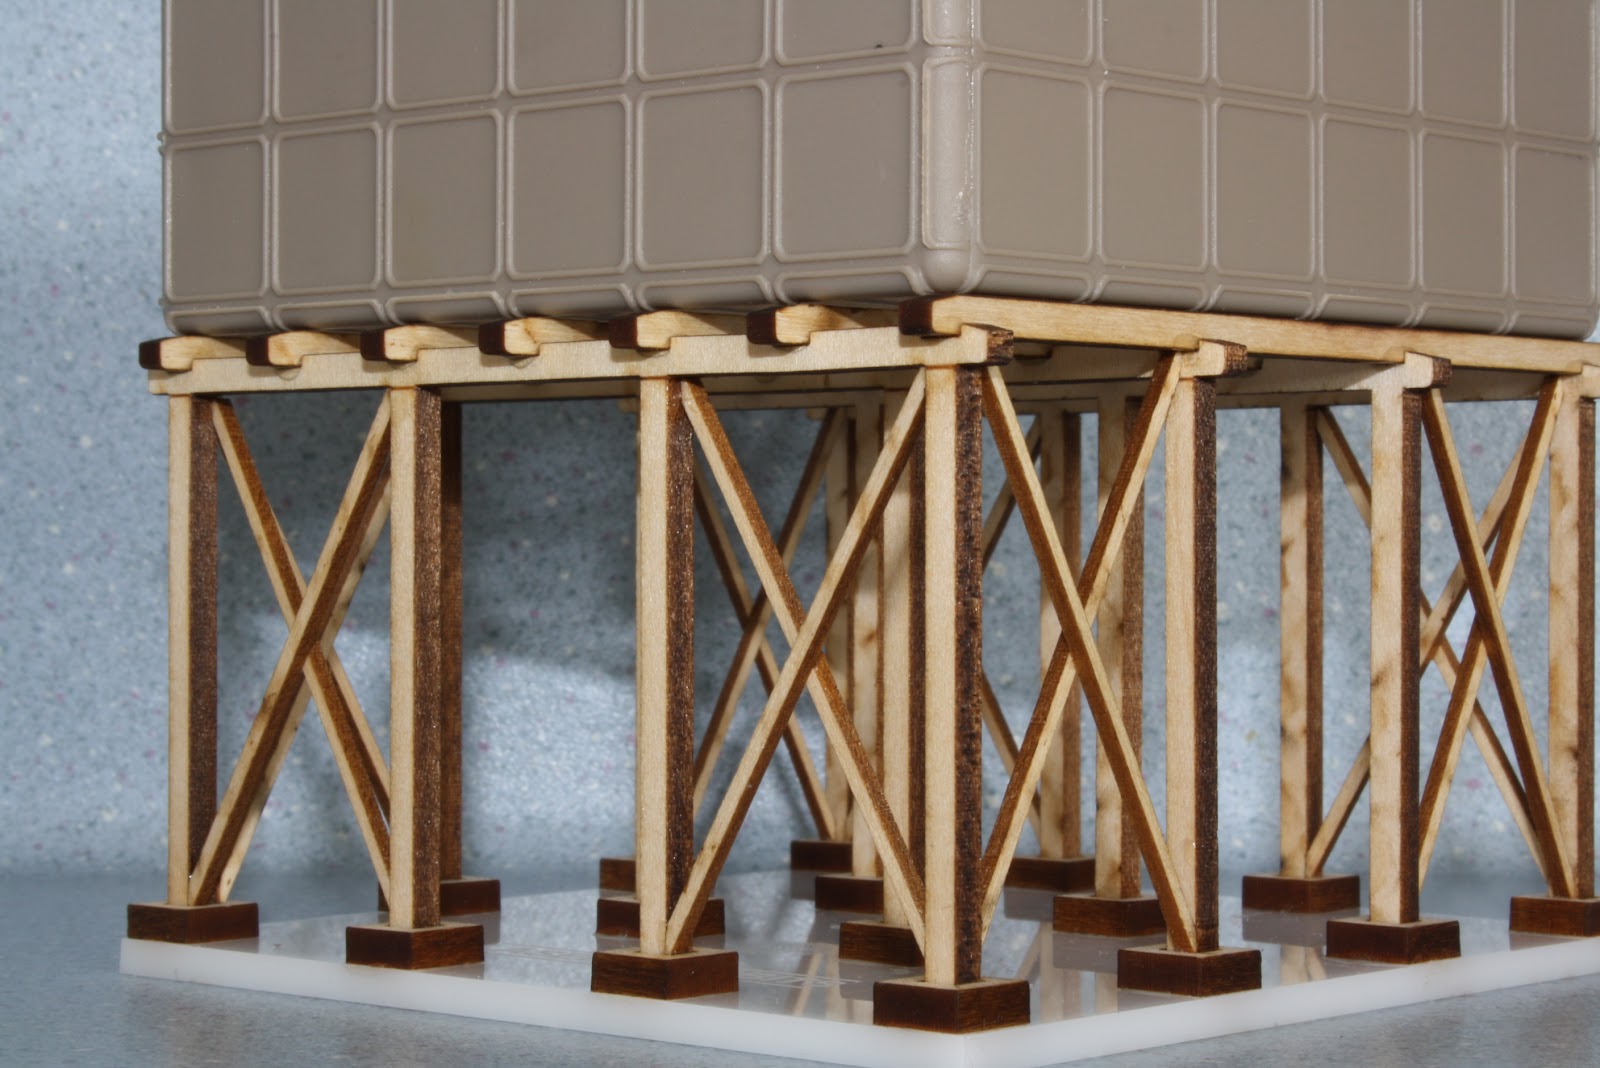
To that end i can state that the Timber Elevated Tank Stand kits have been finalised with packing taking place today & should be completed tomorrow... There will be a separate blog post to deal with this issue tomorrow night. 

Now to the reason for this post...

There has been a lot written in the past couple of years about oil or petrol depots from a modelling perspective & this obviously has coincided with the multitude of releases of rail tank wagons.  Like any self respecting layout builder, I will
of course be adding at least 2 or 3 depots on my layout.  These additions will also be a labour of love as most of my earlier working life was spent in petroleum & petrochemical depots & terminals.

In the quest to research what is left of the local depots i came across another industry in Goulburn that was unintentionally intertwined with at least one oil depot.  This fascinating little branch ( should be classified as a twig ) or gaggle of sidings located within a hundred or so metres of Goulburn Station is steeped with industry & does present a very real possibility to be incorporated into at least my layout....

The location is just south of Goulburn Station ( on the down side of the mainline ) & branches off  the still utilised South Shunting Neck...although nowadays this neck really only serves as a non mainline link from the workshops & roundhouse to the yard ajacent to the station proper.  The branch leaves the neck via a facing point to the left, leaves the mainline corridor & travels down the left or eastern side of Bungonia Rd.  The branch once served at least 3 oil depots, a sawtooth shed that once housed an animal skin warehouse & a Butter Factory.

The only remnants left along this branch are the Mobil Depot ( in early days the Vacuum Oil Depot ) & the Butter Factory.  Sadly of course none are now served by rail with the branch truncating over the years & ultimately closing sometime in the early 80s with Mobil being the last customer.  Nevertheless there is still plenty of evidence of this once relatively busy rural industrial area.

I spent a few days researching & photographing the location recently & have added some photos that may spark some discussion & hopefully some inspiration for others.

The general location of the branch... to the left in the up direction ( just out of shot ) is the station proper
& main line ( down ) to Albury travels out of picture to the right 
         

 The branch leaves the shunting neck just beyond Baxters Boots & another set of points beyond a gate at the start of Bungonia Road marked the entrance to the Mobil Depot...  behind this depot was the Butter Factory which had earlier on one & then two sidings.  Back on the branch proper... it can be seen that the line then serviced another two depots before terminating at the end of the street.  Some locals have told me that the siding extended beyond what is shown above to a sand quarry a little further on but i am yet to find any solid evidence of this at this stage.


Where it all begins... the points to the branch leaving the shunting neck... the main lines in the background
Goulburn Station just out of view in the top right of the photo....behind the photographer is the points serving the Mobil Depot
& branch continuation.  


Same location as the last shot athough in the opossite direction with the Mobil siding ( which also served the Butter Factory in earlier days ) curving away to the left & the branch proper at bottom of shot .
 

The most interesting aspect of this shot is the siding which once served the Mobil Depot....once served the Butter Factory located behind the depot.  The shed with roof just visible to the left of the distant telegraph pole now sits on the alignment of the siding extension to the Butter factory.


This shot is taken further down the branch extension looking back to the site of the last photo.  The road in the foreground leads from Bungonia Road to the Butter Factory at the rear of the Mobil Depot.  As the branch crosses this access road it also marks the end of any real visible traces of the branch extension beyond this point.


This shot is from Bungonia Rd looking down the access road to the Butter Factory... Mobil perimeter at left with Sophie standing where the branch extension once crossed the access road.  The shed to the mid left is now standing on the Butter Factory siding alignment.


Further on down the access road toward the Butter Factory reveals the remnants of at least one siding. To my left was located a set of points that split the sidings with the visible track serving a small shed used for coal unloading & storage for the boiler  & the other siding to the left leading to a loading dock which is now covered in & its entrance marked by the signwriting on the front wall & some marks in the tar road in front.    


A closer view of the Butter Factory showing where one siding served the now closed in loading dock...which extended the full lenght of the building side.... The coal siding is just visible at bottom right.

To give some idea of the output of this factory... In 1907 under the ownership of the Argyle Cooperative Central Dairy Co. the output for the year was 262.5 tons of butter ( an increase of 10 tons over the previous year ) with 230 boxes of butter being exported to old mother England.

The history of the Butter Factory was a checkered one with it closing & reopening on numerous occasions & this was governed primarily by the farmers moving from dairy operations to wool & beef as the prices ( and expected profits ) fluctuated. Obviously weather & rainfall patterns would have been a governing influence as well.


Another view of the Butter Factory showing the architectural aspects... The dock was used for road transport.
The Butter Factory was also used as a Dairy Farmers milk depot in later years.
It has been the home of York Foods for the last 22 years who have a long association with cooking oils & the building is now used as a manufacturing base for their range of speciality products like Wagyu Dripping etc.... I can attest to the products...Yummy


Looking back up the access road toward Bungonia Rd.  With the alignment of the old loading dock siding now more visible....With the coal delivery siding on the left.  The points were located just beyond the large tree & the siding then
 traversed through the Mobil Depot... back toward the branch junction & main line...


As a closing shot... back in front of the Mobil Depot showing the branch continuation meandering to align itself with the other customers along Bungonia Road...from here the branch extended for another 200 to 300 metres.

In closing i am not sure how unique it is for a branchline to serve another industry requiring shunting through an operational petroleum depot.  It is certainly against all convention.  Some locals tell me it actually happened & some say the storage tanks on the right of the siding were not in existence when the Butter Factory was rail accessed therefore technically it did not happen... Either way it is a nice thought & certainly this location is food for thought when planning layout industry & associated sidings.  I now have compiled a fairly complete history of the Butter Factory & if nothing else it satisfies my want to study the history both rail & social aspects of  interesting locations. 

Saturday 10 November 2012

Planning A Trip North...

All,

Another busy weekend...

Following a chat with Warren Herbert from Gwydir Valley Models it has been decided that the collection of completed & planned Laser Rail Bits kits will be going on a road trip.

There is a convention planned in the Northern Tablelands next weekend & Warren has kindly offered the opportunity for the "collection" to be on show.  While i don't profess to know much about this get together, it is time that i swallow my apprehensions & put the kits under the microscope of the modelling establishment & hopefully there will be some feedback which will help decide the future of some offerings & the fate of others.

I was offered the chance of a showing of our wares by Garry Laker at the Loftus Convention earlier in the year but a last minute incident involving my daughter put paid to that weekend...

So the weekend so far has been a flurry of activity trying to finalise some items & get everything packed & ready to leave here on Monday.... Don't let me down Aussie Post!!!

As part of the preparation process i decided to include the platform signal box for the trip & have spent some time attempting to refine the components.  I must admit that i am far from happy with this little number & here i was thinking that a simple skillion roof structure would be a walk in the park.  I have now finished two signal boxes complete & while the undecorated one will be sent north... I decided to have a play around with the second one.

So what am i not happy with...

Well for starters i decided to finish the corners off with some angle trim & while this certainly hides the component joints it is well over scale & i will revert to a diamond joint where there is a square trim piece on the internal of the wall joints & a scale timber trim on the exterior joint. Also the roof structure is not quite right & will require a redesign that provides closer to scale size components while still allowing a strong assembly.  I will also have to find a two / six panel window assembly for the front face as even though i was unfazed originally...the eight panel variety is bugging me know. There is still the question of guttering & while i have used plastruct channel to replicate the quad guttering & it does look convincing...it would be nice if this item was available locally.  I should have a quantity of 500gallon water tanks arriving soon & these on a timber frame being fed with downpipes should complete the scene.

I know some would also be puzzled by the colours i have selected for the painted sample.  This colour was in use for the station building & cream shed located at Narellan back in the 50s/60s ... I have some photos that certainly show this colour ( or a very close hue ) used & while it is not entirely my cup of tea...I was intrigued enough to try the scheme out. I don't think this scheme will be adopted on anything else I build.

While i has fiddling around i decided to utilise this sample to also try out some weathering ideas i have had which entail the use of water based acrylic, thinned with IPA ( Isocol ) applied in 4 or 5 light coats & left to dry between each.  When dry i have sanded back the colour in some areas & when bare timber has been revealed i then dry brushed some Raven Oil mixed with IPA onto these areas. Not sure if the result is what i was looking but like all things weathering... I will try anything.  It would certainly be interesting to have several coats of differing colour & when rubbing back it would reveal feathered edges of the ages of colours.

Lastly a humorous footnote... I managed to spill a complete paint pot ( white for those interested ) all over the timber paling fence samples being prepared for transit... So at present they look as though they have been in some kind of neighbourhood dispute & will of course not be making the trip north....

Anyway i have added some shots... 

On the left is the sample going north & on the right is the guinea pig...


Roof Installed


Weathering has commenced...


A Little More....Maybe overdone...


Sunday 4 November 2012

Platform Signal Boxes...

All,

First of all i would like to thank all the people for the mini flood of emails responding to the timber water tank stand posts...Apart from the local gang...I have had EOIs from as far away as Israel, Brazil & Old Mother England!!!

It must be obvious by now that this kit will be the next release & if time permits during the week,  the final details, instructions & box labels will be printed & all going well ( the real job stays un panicked ) by mid November they will be available....Here's hoping !!! 

To those who have followed the posts on the other projects planned...they will be all done in one incarnation or another...The period over christmas & new year should allow a fair bit of progress on that front.  BTW none of these kits either planned or available now are "limited run" kits. Once released they will be available for the long term. One thing i have learnt...even with the meagre range we have is that dreaming up a project & working it up for release is one thing...but replenishing the range once released & exhausted is another thing altogether. There may be times where a kit is out of stock but this should be only for short periods  It is an ever increasing spiral & one i must admit i enjoy...If it wasn't for the need to generate an income from the "real business".

Now to the reason behind this post.... My long suffering wife suggested that i have a weekend off...just sit on the lounge & catch up on some reading.. she offered...So i did... ???!!!

I decided to retrace my steps in regards to the Cream Shed project & pulled another pile of publications from the ever increasing library with the view of looking for more examples. Well one thing led to another & i got sidetracked onto signal boxes.  Not the elevated main line variety but the much forgotten branchline examples that were in vast numbers & decorated many country branch platforms many years ago.

With the basic skillion roof design of the cream shed completed, it should not take that long to work up some drawings & samples for a timber version Standard Platform Level Signal Box.  And so it was that part of the weekend was spent perusing the Greg Edwards files & then researching the differing examples that existed in prototype form. 

One thing was evident from the start that just like most things railway...It it pointless just relying on departmental drawings & more important to find examples that belong to a certain family of structures.

So armed with drawings & photos of Wauchope, Barellan, Ganmain & Mittagong Junction etc etc & documenting the minor differences...It was time to produce a version of a 18' 8" x 12' 2" Platform Signal Box.   This initial choice will be followed by the tiny 10' 2" x 10' 2" & the marginally larger  21' 8" x 12' 2"...mind you if these never see the light of day as kits...they will find a home on the layout anyway.

The other attraction of this basic design is that it will come in handy for finalising out of sheds, waiting rooms etc etc

As can be seen from the photographs, this kit is our first foray into a composite type kit & incorporates Tichy brand windows & doors.  Yes it is possible to laser cut windows successfully but the scale size components are very fragile indeed... & assembly would be a nightmare.  The front window assembly is not exactly to prototype...8 panes instead of 6...but i have seen examples of an 8 pane unit...so i am unfazed by this anomally

The need to incorporate other manufacturers components into kits has been coming for a while & i must say that the Tichy brand is up there quality wise on top of that... Don Tichy is a very easy person to deal with... so utilising his stuff in future would be a delight.

For this project the only other components required will be corrugated card, chimney pipe detail for the larger versions, guttering & downpipes & a water tank for some versions  All but the guttering is a relatively easy task to procure & it is amazing that someone has not come up with an easily sourced scale quad guttering detail item...I must do some research on domestic guttering O/S & see what they use...

Anyway that's enough banter for this post...Take a look at the shots....keeping in mind that the sample is a first up trial & the roofing material, guttering & downpipes are yet to be fitted..


General View..
         

The rear showing the vents which i have "cheated" and tried to replicate with the laser rather than a separate detail item...

Opposite end view... I have tried a different technique on this kit & tried to get a better appearance of rusticated weatherboards


Saturday 3 November 2012

Water Tank Update...Update.

All,

As i had promised myself...the elevated water tank samples are complete...

It has been a frustrating week with a trial of birch timber which i had obtained to trial for the columns & bearers of this project an absolute disaster. The birch is essentially a rather expensive ply & the charring which occurred due to the material & laminating glues being "cremated" by the laser was totally unacceptable.  To be honest i have been wanting to trial this stuff on the laser for a while & i have now "been there", "done that",  "bought the T shirt" & am not happy Jan...

So... the end result is that all timberwork in this proposed kit(s) will be basswood.  As much as basswood can be a little brittle across the grain at times...it does look like timber should & does weather & age like timber should.  When the kit is assembled  the individual items come together to form an extremely strong finished article.

 I have decided the baseplate will be 3mm opaque acrylic with the column holes all cut out & ready to go.  The acrylic will give a solid base which will not warp etc over time or during layout scenery building.  The acrylic will accept PVA glue so scenicking the base is no problem.

The rest of the items are all precut & shaped to aid construction.  The footings will remain basswood as the adding of cast components will just add to the cost of the kit & existing footings can be readily painted an aged concrete with ease.  The columns & bearers will be one piece as per the last posting.  There will be 4 of these components & all that is required is the footings to be slid on to each column prior to locating & gluing the columns into the base.  Once these 4 composite components are installed & square to the base plate & each other... the 7 joists can be added & as the bearers have precut recesses... this operation is dead easy & you will end up with a very square & accurate looking stand.  The last items to be added are the diagonal braces & again they precut & shaped to make construction very easy.

The kit should take around an hour or so to complete...taking away glue drying time...

Now to the tanks...My original plan was to purchase the tank kits from the respective manufacturers & offer a complete tank stand kit... but due to a number of political issues this will not be happening in the short term.  There is also the concern where many modellers will already have a tank kit or two in the drawer & all they need is a stand for them.

While talking about the tanks & to aid in our decision of how many kits to produce in the first run... I have included an email address   harlow@harlowgraphics.com.au  & would seek "expressions of interest" for numbers & another  issue  of importance to canvass is which tank you are proposing to fit to the stand.  While the Ian Lindsay tank is a simple placement once the stand is complete... The Silvermaz unit is another issue altogether. The tank floor that comes with the kit has joists moulded into it & we  have fabricated a replacement acrylic floor to make fitment to our tank stand easier...but knowing which tank you intend to use will give us a better idea of how many of these replacements to make...

On the subject of plumbing....to get the kit out there in the first instance & keep pricing down... will mean we will have to shelve plans of including plumbing... While looking at the many photos of the prototype i would feel sure that many modellers will already have all the bits needed in the "scrap box"

Also over the christmas break it is my intention to watch a lot of cricket & golf... gather some tank kits " retail" & build some of these kits & offer them as finished items on our stands with water, plumbing, weathered etc etc...i will post if this happens...& they will most probably appear on ebay.

In closing...during the week i will attend to the pack notes & box artwork & hopefully within the next week or so another kit can be added to our range....

As for price of these kits...while this has not been finalised we would anticipate a price of around $30/35.00...Which when added to the tank cost would put a water tank completed on the layout for around $40/45.00


The acrylic base with column locations ...pre-cut


The original Casula / Sivermaz tank floor on the left & the replacement floor on the right


Stand completed with modified Silvermaz tank ( new tank floor )


Close up of stand detail...


Bare Stand...

Sunday 28 October 2012

Water Tank Progress

All,

In between chasing CPHs & keeping clear of snakes....I have made progress on the Elevated Water Tank Project

Thought i would post some photos for comments...good or bad... all comments welcome.

The water tank stand in the photos is only a proof.  I will build probably 5 or 6 of these structures to ensure all dimensions are correct, all parts fit correctly, ensure we have the best method of  " ease of assembly"....and probably most important of all is that it just looks right.

At this point i take the opportunity to thank Ian Storrie from Ian Lindsay Models fame for his help & support thus far.

The tank which adorns the top of the structure is from his fine range.... I will look at other maker's tanks & designs as time goes along.

From the bottom up... I designed a base with pre spaced & cut holes for the columns. This base is made of MDF & while quite o/k for mock ups...the finished article will probably feature an acrylic base for sturdiness. This base / assembly jig certainly makes construction & alignment very easy.

The concrete footings are laser cut basswood & while they look o/k, I will probably look at getting some castings done with the grout mound etc...time will tell.

The columns & bearer assembly are a one piece affair with a laser line where the columns meet with the underside of the bearers to simulate the join...There are 4 of these assemblies that make up the bulk of the kit...very easy for assembly.  Other features are the cutouts in the top surface of the bearer at the correct depth & spacings which allow the joists to be installed accurately & with ease.  This design ensures a surprisingly sturdy finished article.  While on the bearers & joists... we have captured the chamfered top & rounded bottom of each component end.

So what is left to do... The diagonal bracings will now be fabricated & plumbing investigated...No promises here, but i will explore options for inclusion of this feature.

As much as i have followed departmental plans so far... I will need to modify some things along the way....for example the bearers & joists need to be lengthened to accomodate the tank & allow for the slight overhang beyond the tank.

So there you have it....I will post some more shots throughout the week as mods are applied & bracings are completed.


One piece column & bearer assembly...


Bearer & joist detail....note simulated join between column & bearer...


Overview of the stand...sans tank

Saturday 27 October 2012

Musings & Candy LLVs

All,

As you all know i have made the decision on an era to model & concentrate on....This being the very late steam & transition period sometime between 1966 & say 1973. 

While cleaning out the cupboards of stuff i have accumulated over the years i came across an LLV that is painted in the candy livery.  I wasn't sure what to do about this wagon but one thing is for sure it does not fit my chosen era.  It is a very well built & painted AR kits offering that i like very much.  After much to-ing & fro-ing i have decided to list it on ebay & see it go to a home where it may well be shown & run in a fashion it deserves.

The main reason for this posting is to spark a bit of debate & see if any more history on this wagon comes out of it.

From what i know...there were two LLVs that were treated to this livery & were numbered W2613 & W2615.  One train of thought is that this scheme was carried out as a trial & that a positive reaction may well have seen more of the greater wagon fleet adorned as well.  If this was the case it would have been a shortlived excercise as history has shown that the loco fleets so treated ended up with variations that saw the initial candy scheme truncated to a plain red ( red terror ) scheme in an obvious austerity measure.  In hindsight it is easy to see that the original candy scheme would have been very costly to maintain in both material & labour plus the time taken to initially treat & maintain this livery would have severely hampered the ability to quickly turn around locos following a Dulux service.

There are other less believable rumors that have circulated over the years & while i profess to know very little about the real reason for the conversion I feel that the codes that they ended up with probably give a hint as to more likely reasons. 

Mind you in the prototype shots i have seen i cannot make out a code board anyway....so did they ever "wear"  these codes

I have only seen a couple of shots of the prototype vans after conversion & am of the belief they may still reside in Cowra. 

Hopefully someone more learned who reads this blog may well be able to shed some light on the mystery.


The wagon described in model form


Another view...


Wednesday 24 October 2012

Milk & Hobby Shops

All

Just received a package of Austrains 4 wheelers from Micro Models Hobbyland at Hornsby.

Before i go any further in this posting i feel obliged to give this hobbyshop a plug... I have been trying to track down the availability of some 4 wheel offerings from Austrains.  The Austrains site has scant reference to some wagons & as i did not go to the Liverpool exhibition due to work comitments,  I was certainly out of the loop. ( No Pun Intended )

I did ring the manufacturer three weeks ago...but was told that apart from the exhibition...the wagons i was wanting were unavailable from them & i would have to wait until the website was updated & order forms made available.  I will say little else about this phenomena...suffice to say the site has not been updated & I only became aware of the availability of said wagons through trolling the web...

But i digress...I rang the above mentioned hobbyshop on Sunday & was greeted with a warm welcome & a genuine understanding of my dilema.  I knew the types of wagons i was after...but had no knowledge of how they were packed & pack details, numbers etc.  The person i spoke to was Darlene & she spent a fair amount of time sorting out my issue & indeed while i was on the phone i also took the opportunity to purchase a couple of IDR MLVs for good measure.

And so it was... that this morning's mail contained a box from Hobbyland with a pack of SRC Refrigerated Vans, 2 Packs of LV Milk Vans ( Milk Van Pack C & D ) & the MLV kits...all wrapped to within an inch of their lives.....Brilliant service, delivery & packaging....Thanks to all at Hobbyland.

Now to the wagons themselves.....At first glance they are nothing short of superb.  The bar has again been raised & one can't imagine what the future holds for Aussie outline modellers regarding detail & quality. The underfloor detail, crispness, and attention to finer detail of the bodywork is quite amazing.

I must admit to not being an expert where LV Milk Wagons are concerned. Each pack contains 2 double roof versions & 2 canvas roof versions. If i am correct & they were canvas...then i will resurface the roofs of these wagons to better represent these wagons in service. I guess i will also research the internal tank details & add any detail i can to the inside that may have been visible from the outside.....Then go crazy with the airbrush & weathering mediums...


Are there any downsides.... Well nothing of any great consequence that i can see apart from one brake hanger & shoe was dislodged during transit somewhere along the line & was in the box under another wagon & one of the double roofs on an LV was a bit loose...If that is the sum total of flaws then i am one happy modeller....I will see how the couplers go on these wagons...but i can see a conversion coming on.

While i cannot work out the marketing strategy of this manufacturer...the present 4 wheel offerings are an absolute watershed moment for the hobby & i cannot wait for the "Ultimate" S truck & one would imagine an updated K would be not too far away.... I just won't bother relying on manufacturer websites for my info...


Sunday 21 October 2012

A Tale Of Two 49s, Tsunamis & Sugar Cubes...

All,

This weekend was spent fitting sound to the two 49 class branchliners on the roster.

The first attempted was 4917 & this loco is fresh out of the box albeit being in storage for a couple of years.  This was the first time i had attempted this class of loco & i was acutely aware that the limited space would be a test to this amateur sound fitter.

I have decided to standardise with Soundtraxx Tsunami AT 1000 decoders where possible & have so far successfully fitted these decoders to the Trainorama 44 & 42 class & an Austrains 442 class with little difficulty.

A point i have come to savour rather than fear is that with the use of this type of decoder...removal of the factory fitted circuit board is preferable & does offer a clean slate & more room for installation of the Soundtraxx decoder. 

All went smoothly with 4917 until a fault was found in the new decoder.  After installation was completed & the loco was placed either on the main or programming track both headlights ( either end ) would be on regardless of direction or whether selected to be on from the NCE handpiece.  After reseting the decoder offered no result   A call to the supplier all but assured me that i probably had done nothing wrong with the fitment & this type of fault in a new decoder while rare... does happen.  I had the option of sending the offending unit back...but elected to use this as a learning experience & wire the lighting through the alternative Function 5 & 6 tabs on the decoder & then programme these functions to operate as per usual.

I should state at this point that with the 49s... I decided to fit LEDs as replacements for the factory fitted headlights & do away with the marker lights altogether.  This decision while probably angering some is a personal one as i do not consider this option as important and as some of the fleet do not have this option anyway...best i standardise & have all locos the same.

4917 was duly completed & i am more than happy with the finished result. I will now play around with the loco through DecoderPro & personalise some of the features & running qualities....Then it is off to be weathered & into service.

Now to 4910... a secondhand unit i purchased with Loksound already installed... This loco under power sounded more like fingernails being drawn down a blackboard rather than anything that travels on rails & cried out to be Tsunami-ised.  The same conversion methodology applied to this loco except the need to aquire a speaker setup as when it was fitted with Loksound the original speaker & enclosure were obviously discarded.

A search for a suitable speaker proved a little more difficult than expected.  The well known local DCC supplier i contacted seemed a little unsure about a replacement & so a couple of 8 ohm speakers were recommended & mail ordered... again this would prove to be a learning experience.  The first speaker was a common or garden 8 ohm unit... i am unsure why this unit was recommended as it had no hope of fitting into the hood of a 49 class anyway....the second speaker was sent purely as a trial for feedback and is nicknamed a " sugar cube".  It is manufactured by ESU and the little bugger only measures 14mm x 12mm with a thickness of around 5 mm with mounting tape.  After fitment of the decoder & sugar cube speaker the chassis was given a run & while the speaker's operation was admirable...it does not stack up with the output afforded by the original speaker fitted to this class of loco ex factory.  With no other options to get this loco finished.... I raided a 47class I have & "borrowed" the speaker.  I still need to fit the LEDs & another branchliner will be ready for service.

I am sure i have said this before... if you are putting off installing sound for fear of the unknown....DON'T.  Once you have fitted sound to one loco, the bulk of the mystique will disappear & there is a another complete side to the hobby in learning & tweeking to get the best out of your locos.


4917 in the operating theatre....I must admit i like the DCC Concepts range of accessories....
There might be cheaper stuff out there but i like the quality of their stuff


4917 stripped of original board ( visible at bottom) Speaker will stay & all wiring will be tidied & readied before Tsunami is installed


Close up of the reatained factory speaker & enclosure.  Of interest is that the speaker enclosure also supports the No 2 end lighting circuit board & housing...


4910 being fitted with the Tsunami Decoder.  At far left is the No 1 end & headlight circuit board enclosure....
Of contrast is a comparison of the No 2 end of this loco & that of 4917....
The original speaker & enclosure had been discarded when the Loksound unit was installed.....This required a new enclosure & lighting support housing to be fabricated when converted back to Tsunami...


The Sugar Cube speaker & packaging


Close up of the Sugar Cube ESU speaker....


4910 with Tsunami & 47 class speaker & modified enclosure fitted
All that is required now is the fitting of the No2 end lighting & a final wiring tidy up.


Saturday 13 October 2012

Big Brother & Branchline Progress...

All,

Hmmm 2 posts in one day...I need a hobby!!!

With the fleet now thinned out & all pressing commitments under control... I finally got the opportunity to spend some time on the layout.  Two issues have been niggling for some time & i have now been able to address both.

The first is the destination of the branch line which begins at Fish River.  It leaves the up end of the yard, crosses Fish River adjacent to the main line & then enters a tunnel which takes the track through to the second area of the train room.

This branch will now exit the tunnel into this area & travel around 3 walls of this 3.8m x 3.8m room servicing some industries & will terminate at a branch line station area with minimal infrastructure.... There will be a false backdrop around this room 200 / 250mm out from the walls to allow the main line to traverse this room unseen on the outer wall.

At some time in the future another 3m x 3.8m area of the shed adjacent to this area will be lined & utilised as a modelling & maintenance area & there is a possibility that the branch line will continue through into this room. As both main & branch are not grade separated this would necessitate the branch crossing the hidden main on the level & while feasible i am not entirely sold on this idea.

As already touched on. The main line which will now be a single line will basically dissappear into the tunnel at the up end of the yard & will run parallel & hidden from the branch line through this area & then  re appear near the train room access doorway... a liftout section will need to be installed at the doorway & with the revised layout design the liftout will only need to be single line.

In an earlier post i had written about a diorama i had created featuring the DON smallgoods factory & siding & had almost given up on utilising this unit on the layout.  While working out how the branchline would eventuate & the need for a blocking backdrop to hide the main line in the area explained above.... it dawned on me that this diorama could be incorporated in to this area. It would require some modification to one end of the landscaping & a change in trackwork...but at least it would provide an industry & a use for the diorama.  The photos should explain how it has been placed....


How the area looked... showing the main line portal ( furthest from camera ) & the branchline access to this area.
For clarity... the location of Fish River & the bridges & yard are beyond these portals in the main 9m x 3.8m portion of the trainroom


The baseboard has been cut out to accept the diorama & if you enlarge the photo you will be able to see where the branchline needs to appear
While not readily obvious in this shot... the diorama is sitting around 200mm from the rear wall leaving room for the hidden main line.
    

The scenery has been cut out & the branchline tunnel portal now visible.
The branchline will utilise the second siding of the one time diorama & some pointwork will need to be modified.
Also another siding will be laid off the branch to service the area to the right of the photo.  At this stage this area will probably
host a petroleum depot. 


Another issue that i have envisaged in the early stages of the layout is the relative isolation of the room housing the branchline as discussed earlier. I would imagine that the bulk of the action will take place in the main train room area. Main line trains will only traverse through this area... leaving the branch workings & shunting as the only reason for being there.  Even at this early stage... knowing exactly where trains are in this area is handy & while i have no plans to look at track occupancy systems to locate trains, another system needed to be looked at.  I have been studying the viability of a cheap system of remote cameras & this week i purchased a couple of units to try out. 

These units with all hardware & leads cost about $100 for the pair & have the ability to be networked ( wirelessly ) back to a computer & monitor allowing up to around 64 units to be incorporated if required.  The picture quality is not of the "digital handicam" level....but for what i am looking for they appear to be adequate.  I have utilised an old wireless network modem & have one unit working under test.  They can be remotely panned... to around 300 degrees & tilted through around the same, but do not allow remote zoom.  I have an old workstation & monitor setup in the main trainroom & this is presently used for running Decoder Pro & other rail related DCC software...linked to the NCE system.
This system is now hosting the cameras as well & i can already see a need for a couple more cameras monitoring those hard to see & obscure portions of the layout.

I will post more info when i have become more familiar with the units & have selected final installation positions.


Pic of the workstation... this area has been dedicated to housing all things "computer" in the trainroom...& a backdrop will eventually seperate this area from the layout ( left of photo )
At present DecoderPro is utilised & connected to the NCE system & now will also house the camera monitor software & display
Also of interest in this photo is the branchline tunnel portal ( looking FROM Fish River )  just visble on the far left & the access doorway & benchwork located in the branchline area visible to the right


Close up of the camera under test... it can be mounted this way or inverted & comes with all mounting brackets & hardware...

It Must Be Spring...In The Big G.

All,

Just before i pen a layout related post.... Just thought i would add these pics taken last Thursday night & Friday morning.

Goulburn has always had Attention Deficit Disorder where the seasons are concerned...& last week was no exception.

Indeed many years ago it snowed in Goulburn on Christmas Day....I questioned this but sure enough it is in the records...

The snow started to fall at around 11pm Thursday & stopped at around 8am Friday...

I personally love the snow as it adds another dimension to living here...


The main southern line taken from out the front at around 5am Friday...


Same location just looking back at the Hacienda


My Car...


Hmmm Boss's Car....Not Happy Jan!!!


In the backyard.... The site of the long closed Rocky Ponds Southern
G gauge railway empire...


I am having a Sickie Today....